Waffle Iron Instructions: A Comprehensive Guide
Welcome! This guide provides essential instructions for safe and enjoyable waffle making․ Always read all instructions carefully before initial use, ensuring optimal performance and longevity․
Understanding the features, safety, cleaning, and storage will enhance your waffle experience․ Refer to the included recipes for delightful creations!
Understanding Your Waffle Iron
Familiarization is key! Your waffle iron consists of several crucial components․ These include the top and bottom non-stick plates, responsible for creating the golden-brown texture we all love․ The housing encases the heating elements, providing insulation and structural support․ Pay attention to the handles, designed for safe operation, and the temperature control, allowing you to adjust cooking intensity․
Many models feature indicator lights – typically one for power and another indicating when the iron has reached the desired temperature․ Some advanced irons boast adjustable browning controls for customized results․ Understanding these special features, as outlined in your product’s documentation, is vital․
Before use, identify the cord and plug, ensuring they are undamaged․ Never operate the iron with a damaged cord․ Recognizing these parts will help you follow instructions for proper use and maintenance, maximizing your waffle-making enjoyment and ensuring safety․
Important Safety Precautions
Safety first! Always prioritize safety when operating your waffle iron․ Never immerse the cord, plug, or unit in water or other liquids to prevent electrical shock․ Close supervision is crucial when children are nearby․ Always unplug the iron from the outlet when not in use and before cleaning – allow it to cool completely first․
Do not operate the appliance with a damaged cord or plug, or if it malfunctions․ Return it to an authorized service facility for repair․ Avoid using accessory attachments not recommended by the manufacturer, as they may pose a risk of fire, shock, or injury․
Never use the waffle iron outdoors․ Ensure the power cord doesn’t hang over edges or touch hot surfaces․ Avoid placing it near hot burners or in a heated oven․ Following these important safeguards will ensure a safe and enjoyable waffle-making experience․
Before First Use: Preparation
Prior to your inaugural waffle-making session, thorough preparation is key․ Begin by carefully unpacking your waffle iron and removing all packaging materials․ Inspect the unit for any visible damage․ Gently wipe down the exterior with a damp cloth to remove any dust or residue from the manufacturing process․
Crucially, do not use abrasive cleaners, as they may damage the finish․ Ensure the non-stick plates are clean and free of any debris․ A light coating of cooking spray can be applied to the plates to further enhance the non-stick properties, although this isn’t always necessary․
Familiarize yourself with all the components and features of your waffle iron․ Reading the instructions for use will ensure you understand the operation and safety guidelines before proceeding․ This initial preparation will set the stage for perfect waffles!
Setting Up Your Waffle Iron
Proper setup is essential for optimal waffle creation․ Begin by placing your waffle iron on a stable, heat-resistant surface, away from flammable materials․ Ensure there is adequate ventilation around the appliance․ Position the waffle iron so the handle is easily accessible and the cord is not dangling over the edge of a counter or touching hot surfaces․
Confirm the waffle iron is unplugged before proceeding․ Open the waffle iron and inspect the plates to ensure they are clean and free of any obstructions․ Some models may have adjustable feet to level the unit; utilize these if necessary for even cooking․
Double-check that all components are correctly assembled according to the instructions for use․ A secure setup prevents accidents and ensures consistent waffle results․ Now you are ready to power on and preheat!
Powering On and Preheat Instructions

Before powering on, ensure the waffle iron is correctly set up on a stable surface․ Plug the cord into a grounded electrical outlet․ Most waffle irons feature a power indicator light; this will illuminate when the unit is receiving power․
To begin preheating, turn the waffle iron on using the power switch or dial․ Allow the unit to preheat fully – this is crucial for achieving golden-brown, crispy waffles․ The preheating time varies by model, but generally takes between 3-5 minutes․
A ready indicator light will signal when the waffle iron has reached the optimal temperature․ Do not attempt to pour batter until this light indicates readiness․ Proper preheating ensures even cooking and prevents sticking․ Patience is key for perfect waffles!
Cooking with Your Waffle Iron
Once the waffle iron is preheated and the ready indicator light is on, you’re ready to begin cooking! Remember to exercise caution as the plates will be very hot․ Carefully open the waffle iron lid․
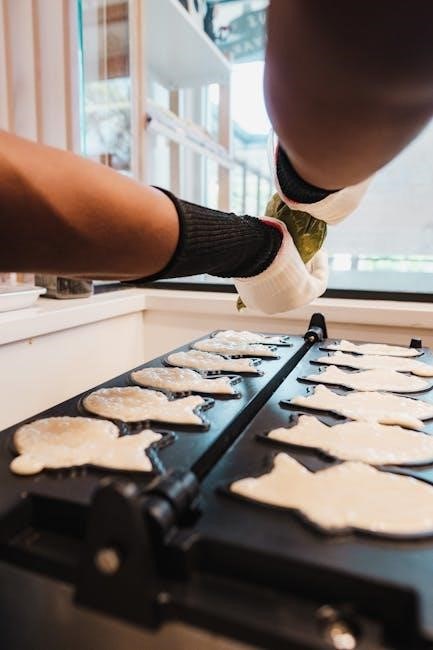
Cooking involves pouring batter onto the lower plate, ensuring even distribution․ Close the lid gently, but firmly, to create a seal․ Avoid overfilling, as excess batter will spill over the edges․
Adjust the temperature settings according to your preference and the waffle recipe․ Cooking times vary, but generally range from 3-5 minutes․ Do not open the lid prematurely, as this can result in undercooked waffles․ Trust the process and allow the waffle iron to work its magic!
Pouring the Batter
Carefully open the preheated waffle iron․ Using a measuring cup or ladle, pour the batter onto the center of the lower plate․ The amount of batter will depend on the size of your waffle iron and your desired waffle thickness – consult your recipe!
Aim for even distribution, gently spreading the batter with a spoon if necessary․ Avoid pouring batter too close to the edges, as it will likely overflow when the lid is closed․ Overfilling can create a mess and make cleanup more difficult․
Close the lid gently but firmly․ Do not force it shut․ The batter should spread to cover most of the plate surface, creating a consistent waffle shape․ Remember, a little practice makes perfect when it comes to achieving the ideal batter amount!
Adjusting Temperature Settings
Most waffle irons feature adjustable temperature controls, typically ranging from a minimum to a maximum setting․ Start with a medium setting for your first waffle, as this provides a good balance for most recipes․ Observe the waffle’s cooking progress closely․
If the waffle is browning too quickly, reduce the temperature․ Conversely, if it’s taking too long to brown or remains pale, increase the temperature․ Different batters and waffle iron models may require slightly different settings․
Experimentation is key to finding the optimal temperature for your preferred waffle texture and color․ Higher temperatures generally yield crispier waffles, while lower temperatures result in softer waffles․ Always prioritize safety and avoid extreme temperature settings․
Cooking Time Guidelines
Generally, waffle cooking times range from 3 to 5 minutes, but this is heavily influenced by your waffle iron’s temperature setting and the specific batter recipe used․ Initial cooking times should be around 4 minutes as a starting point․
Pay close attention to visual cues rather than relying solely on time․ Look for the waffle to stop steaming and for the indicator light (if equipped) to change color or turn off․ Slight variations in cooking time are normal․
Thicker waffles or those with added ingredients like fruit may require longer cooking times․ Conversely, thinner waffles will cook more quickly․ Consistent monitoring and adjustment of cooking time based on your observations are crucial for perfect waffles․ Remember to check for doneness before removing!
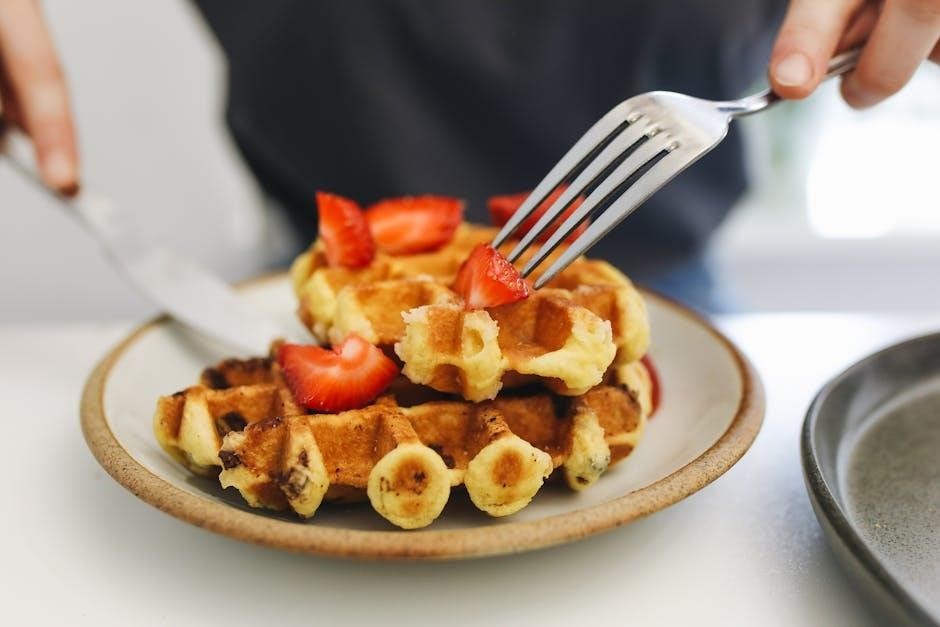
Checking for Doneness
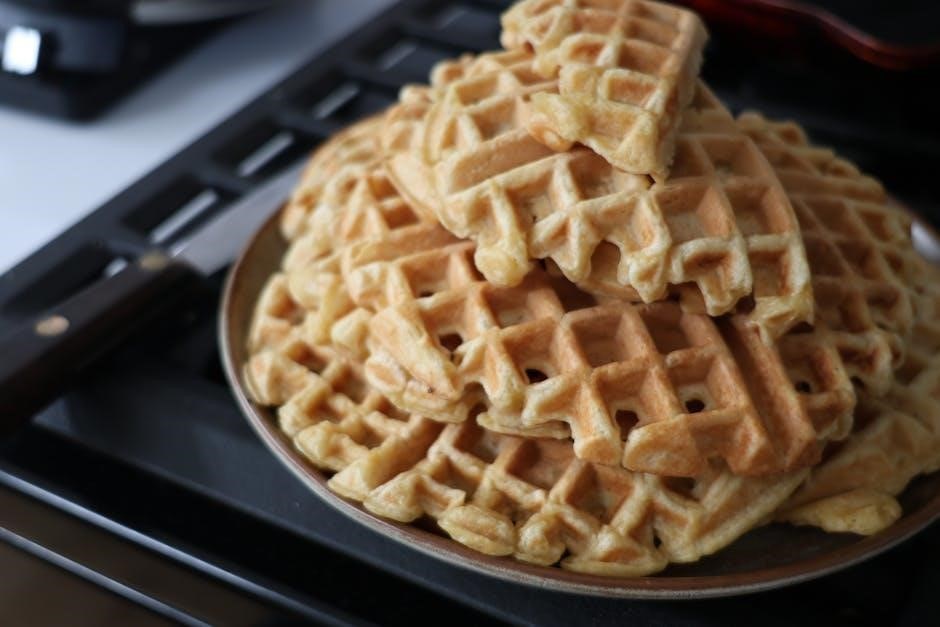
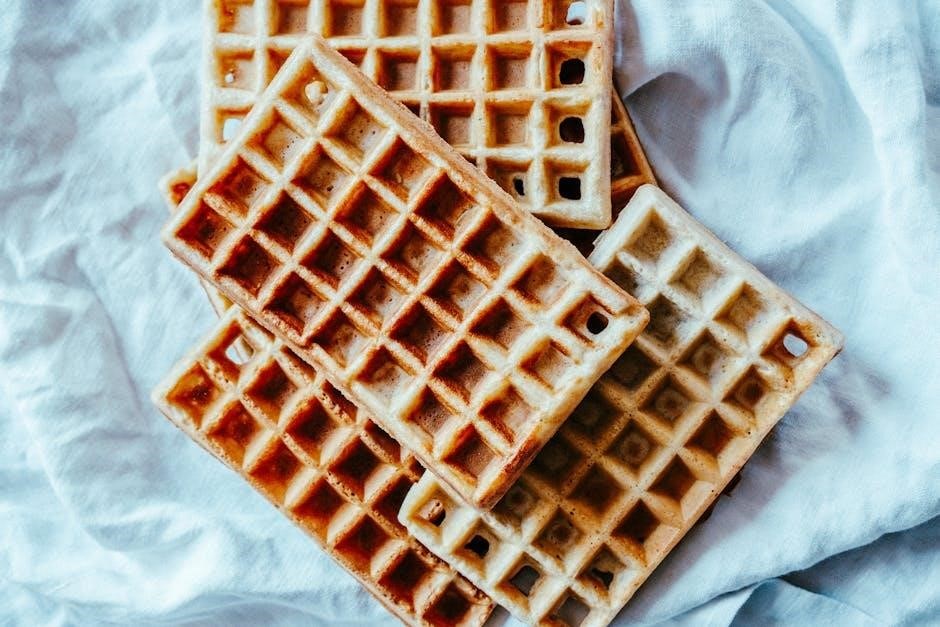
Determining waffle doneness is key to achieving the perfect texture․ Visually, a properly cooked waffle will be golden brown and appear crisp around the edges․ The steaming should have significantly subsided, indicating sufficient internal cooking․
Gently lift a corner of the waffle with a non-metallic utensil – a fork or wooden skewer works well – to assess its color and crispness․ If it sticks, continue cooking for another minute or so․ Avoid forcing it, as this can damage the waffle and the iron’s non-stick surface․
A slightly springy texture indicates a fully cooked interior․ If the waffle feels soft or doughy, extend the cooking time․ Remember that waffles will continue to cook slightly after removal from the iron, so erring on the side of slightly undercooked is preferable to overcooking․
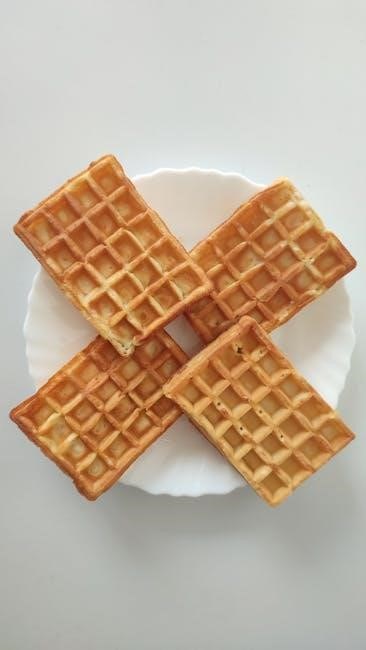
Waffle Recipes to Get You Started
Embark on your waffle-making journey with these delightful recipes! Begin with the timeless Classic Buttermilk Waffles, a family favorite known for its light and fluffy texture․ This recipe utilizes simple ingredients and delivers consistently delicious results, perfect for a weekend breakfast․
For a more indulgent treat, explore the Belgian Waffle Recipe․ These waffles boast deeper pockets, ideal for holding generous amounts of toppings like fresh fruit, whipped cream, and maple syrup․ The recipe incorporates yeast for an extra airy and flavorful experience․
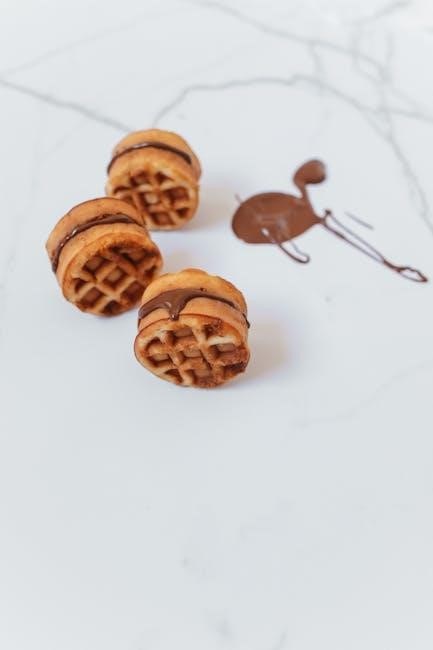
Don’t limit yourself to sweet options! Experiment with Savory Waffle Ideas, such as cheddar and chive waffles paired with fried chicken, or cornmeal waffles served with chili․ These versatile creations showcase the waffle iron’s adaptability beyond breakfast․
Classic Buttermilk Waffles
These classic waffles are a delightful way to start any day! You’ll need 1 ¾ cups all-purpose flour, 2 teaspoons baking powder, ¼ teaspoon baking soda, ½ teaspoon salt, 2 tablespoons sugar, 2 large eggs, 1 ¾ cups buttermilk, 6 tablespoons melted butter, and 1 teaspoon vanilla extract․
In a large bowl, whisk together the dry ingredients․ In a separate bowl, combine the eggs, buttermilk, melted butter, and vanilla․ Pour the wet ingredients into the dry ingredients and stir until just combined – avoid overmixing!
Preheat your waffle iron and lightly grease the plates․ Pour the appropriate amount of batter onto the hot iron (refer to your iron’s instructions)․ Cook until golden brown and crispy, typically 3-5 minutes․ Serve immediately with your favorite toppings!
Belgian Waffle Recipe
For a truly indulgent treat, try these Belgian waffles! You’ll require 2 cups all-purpose flour, 4 teaspoons baking powder, ¼ teaspoon salt, 2 tablespoons sugar, 2 large eggs, 1 ¾ cups milk, 8 tablespoons melted butter, and 1 teaspoon vanilla extract․ Separately, whisk 2 egg whites until stiff peaks form․
Combine the flour, baking powder, salt, and sugar in a large bowl․ In another bowl, whisk together the eggs, milk, melted butter, and vanilla․ Gently fold the wet ingredients into the dry ingredients until just combined․ Carefully fold in the whipped egg whites․
Preheat your Belgian waffle iron․ Pour a generous amount of batter onto the hot plates․ Cook until golden brown and fluffy, usually 4-6 minutes․ Serve immediately with fresh fruit, whipped cream, and maple syrup for a delightful experience!
Savory Waffle Ideas
Beyond sweet treats, your waffle iron excels at savory creations! Consider a cheddar and chive waffle: add 1 cup shredded cheddar and 2 tablespoons chopped chives to your favorite waffle batter․ For a pizza waffle, incorporate ½ cup pizza sauce, ½ cup mozzarella, and your favorite toppings into the batter before cooking․
Cornbread waffles are fantastic with chili; simply use a cornbread mix as your base․ Experiment with adding cooked bacon, sausage, or ham to any savory waffle for extra flavor․ Spice things up with jalapeños or a dash of hot sauce․
Serve savory waffles with fried chicken, eggs, or a side salad for a complete meal․ Don’t be afraid to get creative and explore different cheese, herb, and protein combinations – the possibilities are endless!
Cleaning Your Waffle Iron
Always unplug your waffle iron and allow it to cool completely before cleaning․ Never immerse the cord, plug, or unit in water․ Begin by removing any excess batter with a soft cloth or paper towel․ Avoid abrasive cleaners, as they can damage the non-stick coating․
For non-stick plates, gently wipe with a damp cloth and mild dish soap․ Stubborn residue may require a plastic scraper․ Ensure all soap is removed to prevent altering the taste of future waffles․ The exterior can be cleaned with a damp cloth and a mild cleaning solution․
Regular cleaning prevents buildup and ensures optimal performance․ Proper maintenance extends the life of your waffle iron․ Refer to the manufacturer’s instructions for specific cleaning recommendations․
Cooling Down Period
Allowing your waffle iron to cool down completely before cleaning or storing is crucial for safety and preventing damage․ Hot surfaces pose a burn risk, so patience is key․ Do not attempt to disassemble or clean the unit while it’s still warm․
A sufficient cooling period also prevents warping of the non-stick plates․ Rapid temperature changes can compromise their integrity․ Typically, a cooling period of at least 30 minutes is recommended, but longer is preferable․
During this time, keep the waffle iron in a safe, stable location, away from flammable materials․ Ensure children and pets cannot access it․ Proper cooling contributes to the longevity and safe operation of your appliance․ Always prioritize safety!
Removing Excess Batter
Preventing batter overflow is essential for a clean cooking experience․ If batter spills onto the exterior of the waffle iron during pouring, immediately disconnect the appliance from the power source․ Never attempt to wipe away wet batter while the iron is still energized․
Use a heat-resistant spatula or a soft, damp cloth to gently remove any excess batter that has flowed outside the cooking plates․ Avoid abrasive cleaners or scouring pads, as these can damage the non-stick coating․ Be careful not to push batter into any vents or electrical components․
Regularly wiping away spills during the cooking process minimizes buildup and simplifies cleanup․ Remember safety first – always unplug and allow to cool before extensive cleaning․ Prompt removal prevents sticking and ensures optimal performance․
Cleaning Non-Stick Plates
Maintaining the non-stick coating is crucial for effortless waffle release and longevity․ After each use, and once the waffle iron has completely cooled, gently wipe the plates with a soft, damp cloth or sponge․ Avoid harsh abrasive cleaners, scouring pads, or metal utensils, as these will damage the coating․
For stubborn residue, a paste of baking soda and water can be applied gently․ Allow the paste to sit for a few minutes before wiping clean․ Ensure all traces of baking soda are removed to prevent any aftertaste․ Never immerse the waffle iron in water or any other liquid․
Regular cleaning prevents batter buildup and ensures consistent cooking results․ A lightly oiled cloth can help restore the non-stick properties․ Proper care extends the life of your waffle iron and keeps your waffles tasting delicious!
Cleaning the Exterior
To maintain the appearance and hygiene of your waffle iron, regularly clean the exterior surfaces․ Always ensure the appliance is unplugged and completely cool before cleaning․ Use a soft, damp cloth to wipe down the housing, removing any batter splatters or food residue․
Avoid using abrasive cleaners or scouring pads, as they can scratch or damage the finish․ For tougher stains, a mild dish soap solution can be used, followed by a clean, damp cloth to rinse․ Never spray cleaning solutions directly onto the appliance; instead, apply to the cloth first․
Pay attention to areas around the controls and handles, ensuring they are free from debris․ Regular exterior cleaning not only keeps your waffle iron looking its best but also prevents the buildup of grime and bacteria․ A clean exterior contributes to a safe and enjoyable cooking experience․
Maintenance and Storage
Proper maintenance ensures your waffle iron’s longevity and consistent performance․ After each use, allow the unit to cool completely before undertaking any cleaning or storage procedures․ Regularly inspect the power cord for damage, and if any is found, discontinue use immediately․
For storage, ensure the waffle iron is clean and dry․ Storing it in its original packaging can help protect it from dust and scratches․ If you don’t have the original packaging, wrap it loosely in a plastic bag or cloth․ Avoid storing anything on top of the waffle iron, as this could cause damage․
Keep the appliance in a cool, dry place, away from direct sunlight and moisture․ Following these simple maintenance and storage guidelines will help you enjoy delicious waffles for years to come․ Remember to consult the warranty information for specific details regarding repairs and coverage․

Proper Storage Techniques
Effective storage is crucial for preserving your waffle iron’s condition and extending its lifespan․ Always ensure the appliance is completely cool and dry before storing it away․ Consider utilizing the original packaging if available, as it provides optimal protection against dust and potential damage․
If the original packaging isn’t accessible, wrap the waffle iron loosely in a clean, dry cloth or a plastic bag․ Avoid tightly wrapping it, as this could trap moisture and lead to corrosion․ Store the appliance in a cool, dry location, shielded from direct sunlight and extreme temperatures․
Never store anything heavy on top of the waffle iron, as this could potentially damage the non-stick plates or the exterior casing․ A dedicated shelf or cabinet space is ideal․ Proper storage contributes significantly to the longevity and continued functionality of your beloved waffle maker;
Extending the Life of Your Waffle Iron
To maximize the lifespan of your waffle iron, consistent care and preventative measures are essential․ Regular cleaning, as detailed in the maintenance section, prevents buildup that can degrade performance․ Avoid using abrasive cleaners or scouring pads, which can damage the non-stick coating․
Always unplug the appliance before cleaning and allow it to cool completely․ Inspect the power cord regularly for any signs of damage, and if found, discontinue use immediately․ Proper storage, away from moisture and extreme temperatures, also contributes to longevity․

Gentle handling of the plates is crucial; avoid dropping or subjecting them to impact․ Following these simple guidelines will ensure your waffle iron continues to deliver perfectly golden waffles for years to come, providing countless breakfast memories․ Remember, a little care goes a long way!
Troubleshooting Common Issues
If waffles are sticking, ensure the plates are adequately coated with cooking spray or oil before pouring the batter․ Verify the waffle iron is preheated to the correct temperature; insufficient heat can cause sticking․ Uneven cooking often results from uneven batter distribution – use a consistent amount for each waffle․
Should the iron malfunction, immediately unplug it and allow it to cool․ Do not attempt to disassemble or repair the unit yourself․ Contact a Cuisinart Authorized Service Facility for examination and repair․ Never immerse the cord, plug, or unit in water․
Persistent issues may indicate a problem with the heating element or thermostat․ Ignoring these signs could lead to further damage or safety hazards․ Refer to the warranty information for assistance and potential repair options․ Prioritize safety and professional service for optimal performance․
Addressing Sticking Waffles
Sticking waffles are a common frustration, but easily remedied․ First, ensure a generous and even coating of cooking spray or oil is applied to both the top and bottom plates before each waffle․ Allow the waffle iron to fully preheat; insufficient heat is a primary cause of sticking․ Verify your batter isn’t too thin, as this can seep into the crevices and adhere․
If sticking persists, avoid using metal utensils to lift the waffle, as this can damage the non-stick coating․ Opt for plastic or wooden tools instead․ A slightly longer cooking time may also help, but monitor closely to prevent burning․ Remember to unplug the unit and allow it to cool before attempting to remove stubborn waffles․
Regular cleaning and maintenance, as outlined in the cleaning section, are crucial for preserving the non-stick surface and preventing future sticking issues․ Consistent care extends the life of your waffle iron․
Dealing with Uneven Cooking
Unevenly cooked waffles, pale in some areas and browned in others, can be frustrating․ Ensure the batter is distributed evenly across the waffle iron’s surface; don’t overload or underfill․ Check that your waffle iron is placed on a level surface to guarantee even heat distribution․ Variations in batter consistency can also contribute – a well-mixed batter is key․
If your waffle iron has temperature control, experiment with slightly higher settings, but monitor closely to avoid burning․ Some models have uneven heat distribution by design; rotating the waffle iron 180 degrees halfway through cooking can help compensate․ Avoid opening the lid prematurely, as this releases heat and disrupts the cooking process․
Consistent preheating is vital․ Allow the iron to reach the optimal temperature before adding batter․ Regular cleaning prevents residue buildup that can affect heat transfer and contribute to uneven cooking․
Warranty Information
Your waffle iron is covered by a limited warranty against defects in materials and workmanship, beginning from the date of original purchase․ Please retain your proof of purchase for warranty service․ The warranty period typically ranges from one to several years, depending on the model and retailer․
This warranty does not cover damage resulting from misuse, accidents, unauthorized repairs, or normal wear and tear․ Specifically, damage caused by improper cleaning, using abrasive cleaners, or failing to follow the instructions outlined in this guide is excluded․
To obtain warranty service, contact the manufacturer’s customer support team, providing your model number, date of purchase, and a detailed description of the defect․ Authorized service centers will handle repairs or replacements as deemed necessary․ See the included warranty card or the manufacturer’s website for complete details and contact information․